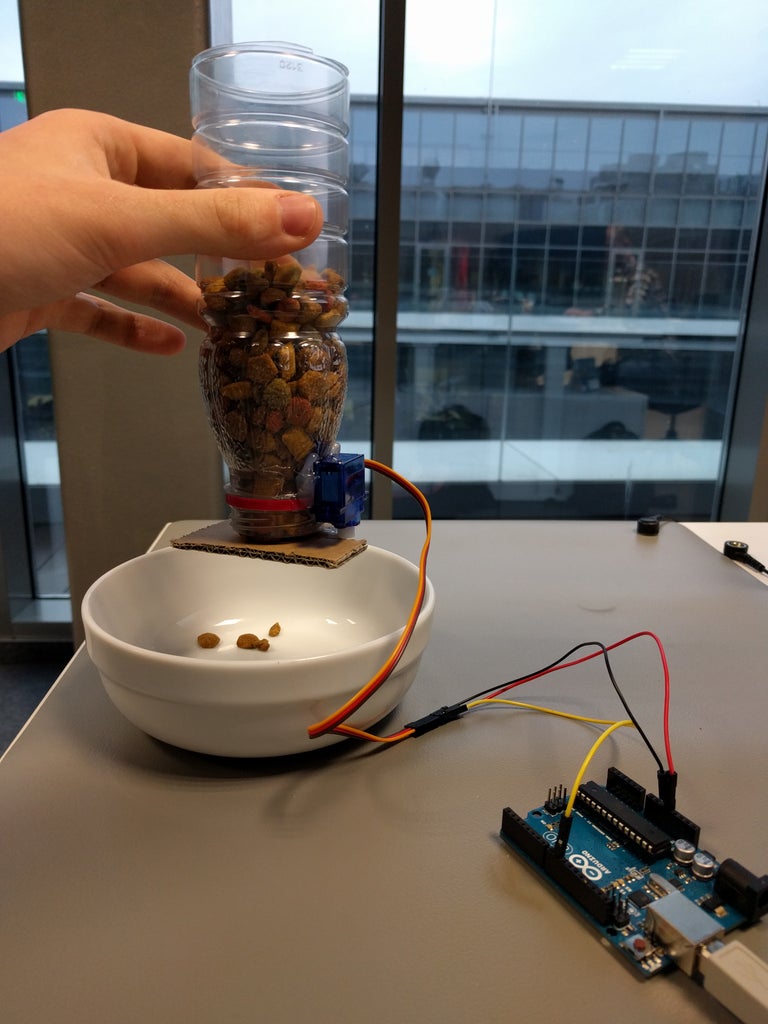
Automatic Arduino Pet Feeder 4 Steps with Pictures Circuit Diagram First, install the servo library. Next, the system is programmed to dispense feed after 5 seconds. The servomotor moves to angle 40 to move the lid away from the bottle opening for about 200 milliseconds to release the feed, then closes again by moving the arm of the servo to angle 100 sliding the lid back under the bottle opening.
Therefore, the command name (Feed) specified for the Pet Feeder movements should be defined correctly. Upload the source code to the Wemos D1 Mini board. Displays the local IP address required for communication with the Pet Feeder. Enter the local IP address displayed on the serial monitor into the application.
Pet Feeder Controlled Via WiFi Circuit Diagram
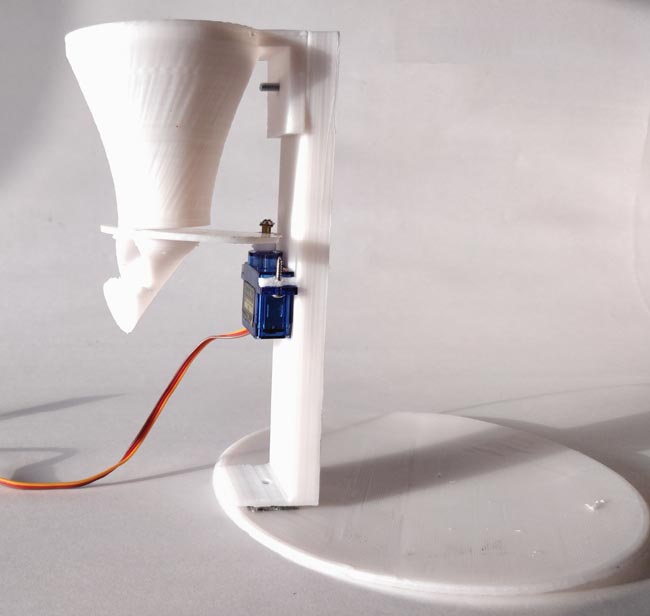
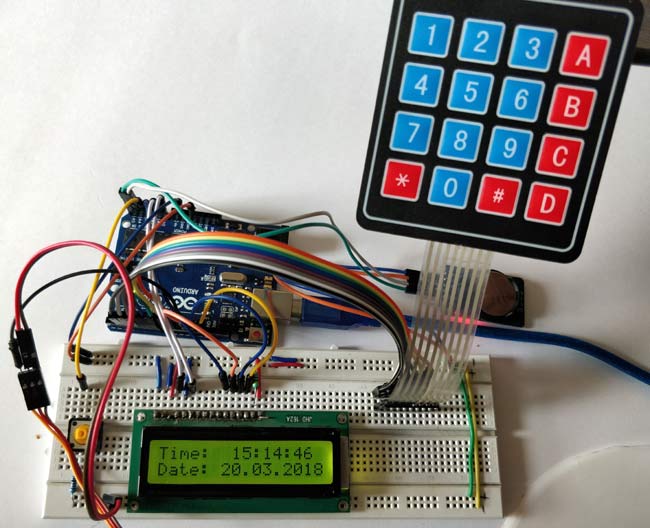
Working of the Automatic Pet Feeder. After uploading the code to the Arduino Uno, the time and date will be displayed on the 16*2 LCD. When you pressed the pushbutton it asks for Pet's feeding time and you have to enter the time using the 4*4 matrix Keypad. Display will show the entered time and as you press 'D' it saves the time. In this project we will see how to make a 3D printed pet feeder. All modeled parts are available for you to replicate the project in your home. The system is very simple: you are asked to enter two times when you want to distribute food, for example 8:30 and 17:30, then, at the indicated time, the stepper motor is activated and drops the food.

Today we are building an Arduino based Automatic Pet Feeder which can automatically serve food to your pet timely. It has a DS3231 RTC (Real Time Clock) Modu

Automatic Pet Feeder using Arduino Circuit Diagram
In this comprehensive guide, we'll walk through the process of constructing a customizable automated pet feeder using Arduino, making pet care a breeze. Materials Required: Arduino board (e.g., Arduino Uno) Servo motor. Pet food hopper or container. 5V power supply for the servo motor. RTC (Real-Time Clock) module. LCD display. Push-button switch